OMNET++入门教程|第1章 —— TicToc模型

官方教程链接

OMNET++入门教程|第1章 —— TicToc模型

1 模型

首先,让我们从一个由两个节点组成的“网络”开始。节点将做一些简单的事情:其中一个节点将创建一个数据包,两个节点将继续来回传递相同的数据包。我将调用节点tic和toc。稍后我们将逐步改进这个模型,在每个步骤中来引入OMNET++特性。

以下是从零开始实现第一个模拟的步骤。

2 建立项目

首先打开OMNET++的主界面,在主菜单中选择 File-> New -> OMNeT++ Project


然后会出现这个界面

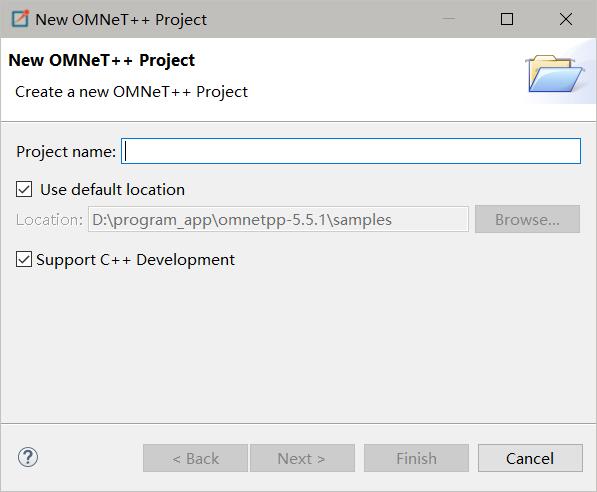
Project name输入TT(官方直接有一个tictoc,如果输入tictoc就直接进入它的例子了,这里我们尝试从头开始写),其他的保持默认即可,点击Next(别点错成Finish),在让你选择 initial content时,选择 Empty project,然后一路Next,最后无法选择Next时选择Finish。最后的效果如图
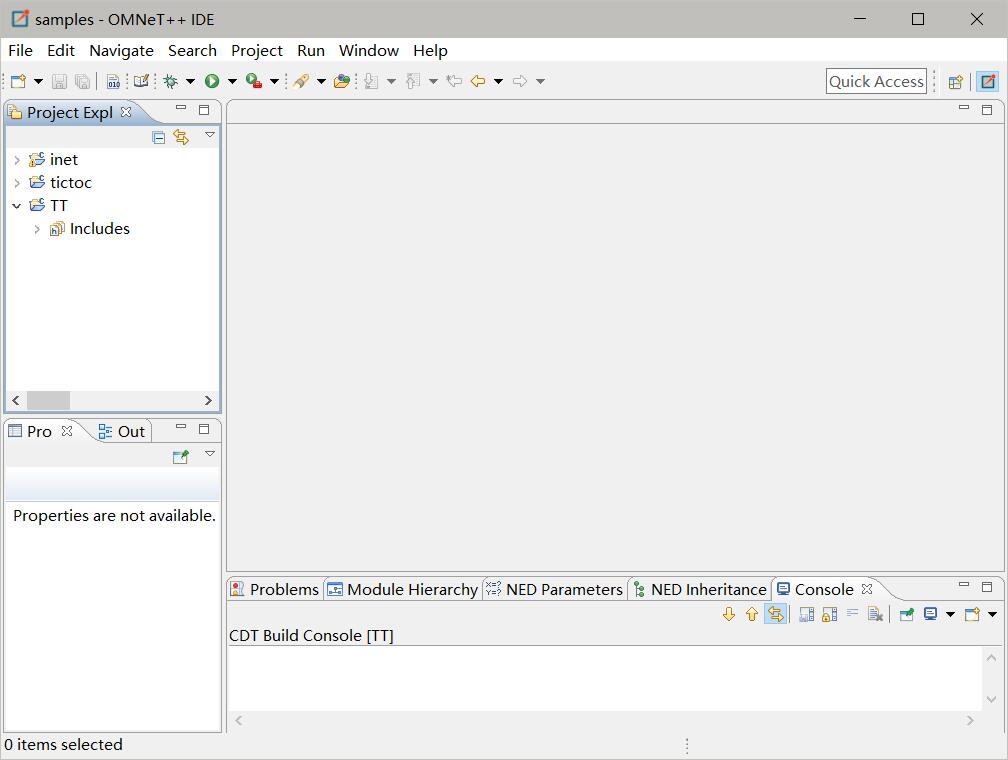
3 添加NED文件

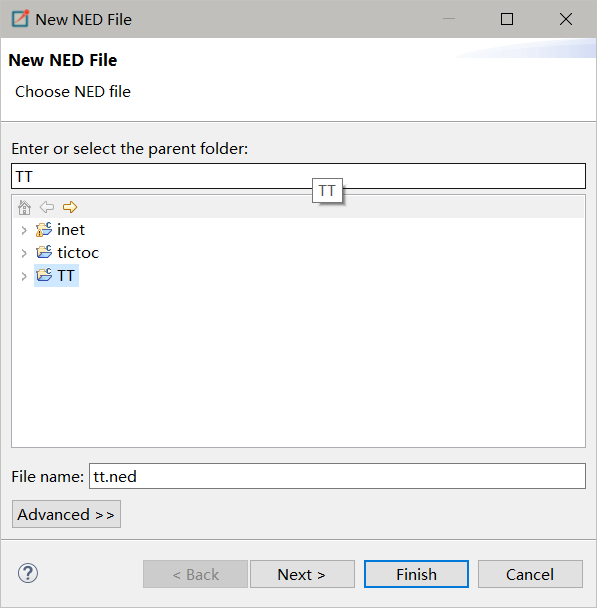
OMNeT ++使用NED文件来定义组件并将它们组装成更大的单元,例如网络。我们开始通过添加NED文件来实现我们的模型。要将文件添加到项目中,请在左侧的项目资源管理器面板中右键单击项目目录 ,然后从菜单中选择 File-> New -> Network Description File (NED)*。下面的 *File name输入tt.ned,然后点击Finish即可

然后就可以开始构建网络了,切换到 Source 模式,然后输入以下内容:

1
2
3
4
5
6
7
8
9
10
11
12
13
14
15
16
17
18
19
20
21
22
simple Txc1
{
gates:
input in;
output out;
}

//
// Two instances (tic and toc) of Txc1 connected both ways.
// Tic and toc will pass messages to one another.
//
network Tictoc1
{
submodules:
tic: Txc1;
toc: Txc1;

connections:

tic.out --> { delay = 100ms; } --> toc.in;
tic.in <-- { delay = 100ms; } <-- toc.out;
}

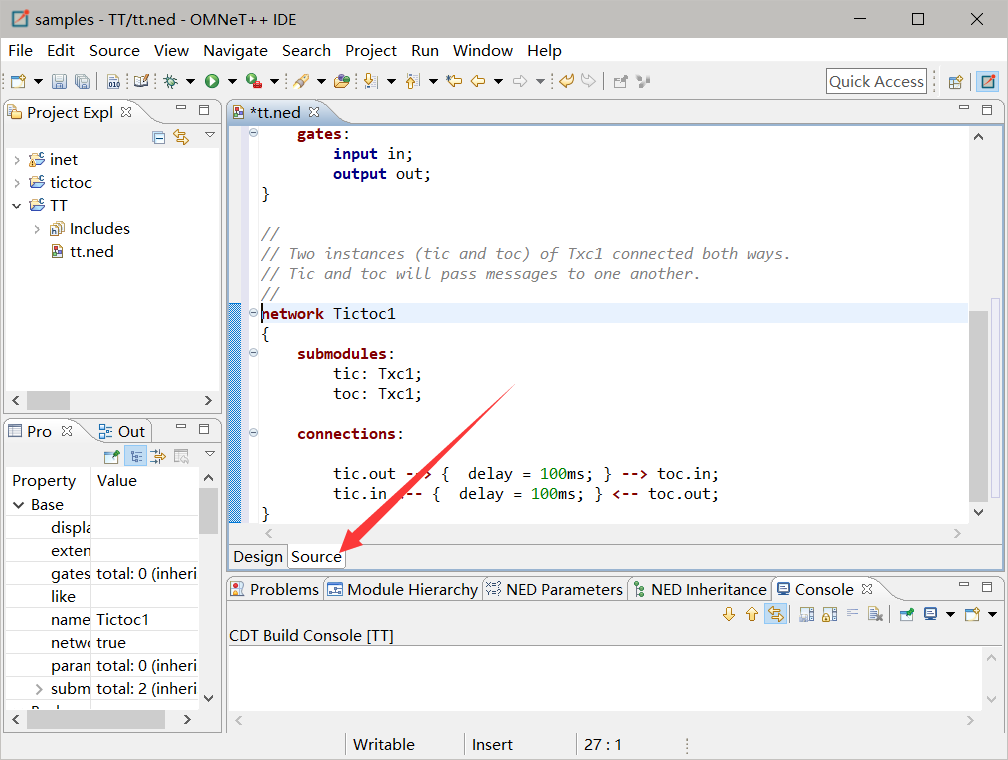
然后切换回 Design 模式,就会看到类似如下的场景
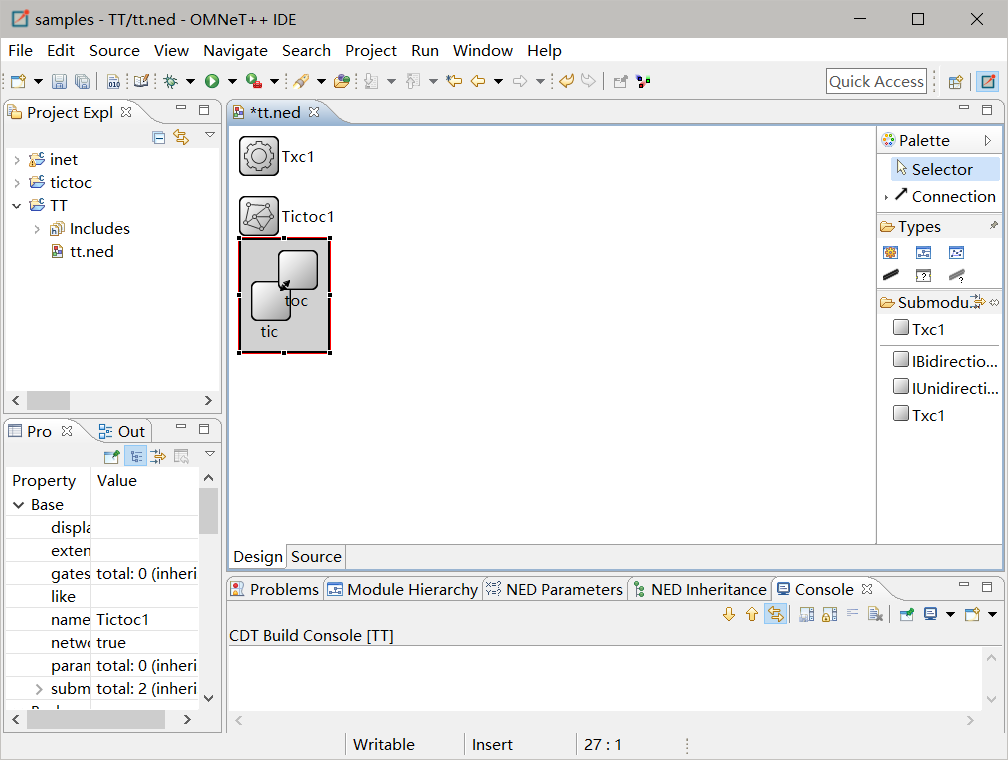
那我们来看一下两块代码是什么意思

首先,第一块定义了一个简单模块Txc1

第二块定义了一个复合模块(类型) Tictoc1,其中包含子模块tic和toc,它们都是简单模块类型Txc1的实例。Tic的输出门(out)连接到toc的输入门(in),Toc的输出门(out)连接到tic的输入门(in) ,传输延迟均为100ms。

4 添加C++文件

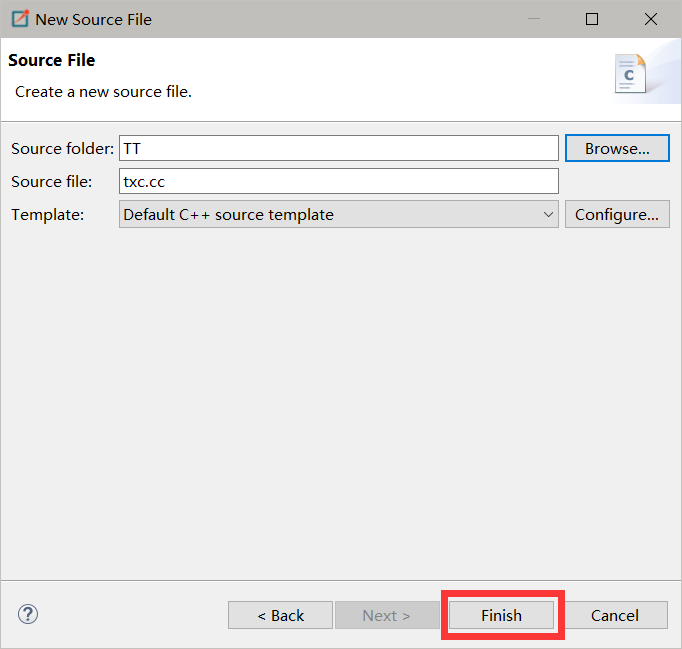
现在,我们需要在C++中实现Txc1简单模块的功能。从项目的菜单中选择 File -> Other,然后在下面的选择栏里选择 C/C++ -> Source File ,创建一个名为txc1.cc的文件,并输入以下内容:

1
2
3
4
5
6
7
8
9
10
11
12
13
14
15
16
17
18
19
20
21
22
23
24
25
26
27
28
29
30
31
32
33
34
35
36
37
38
39
40
41
42
43
44
45
46
47
48
#include <string.h>
#include <omnetpp.h>

using namespace omnetpp;

/**
* Derive the Txc1 class from cSimpleModule. In the Tictoc1 network,
* both the `tic' and `toc' modules are Txc1 objects, created by OMNeT++
* at the beginning of the simulation.
*/
class Txc1 : public cSimpleModule
{
protected:
// The following redefined virtual function holds the algorithm.
virtual void initialize() override;
virtual void handleMessage(cMessage *msg) override;
};

// The module class needs to be registered with OMNeT++
Define_Module(Txc1);

void Txc1::initialize()
{
// Initialize is called at the beginning of the simulation.
// To bootstrap the tic-toc-tic-toc process, one of the modules needs
// to send the first message. Let this be `tic'.

// Am I Tic or Toc?

//仿真初始化,由节点tic发出第一条消息
if (strcmp("tic", getName()) == 0) {
// create and send first message on gate "out". "tictocMsg" is an
// arbitrary string which will be the name of the message object.
//创建输出门“out”发出第一条消息"tictocMsg",不过发的啥这里并不关心
cMessage *msg = new cMessage("tictocMsg");
send(msg, "out");
}
}

void Txc1::handleMessage(cMessage *msg)
{
// The handleMessage() method is called whenever a message arrives
// at the module. Here, we just send it to the other module, through
// gate `out'. Because both `tic' and `toc' does the same, the message
// will bounce between the two.

send(msg, "out"); // send out the message
}


根据 NED 文件中定义的字模块关系,initialize() 函数中节点 tic 从输出门“out”发出的消息经过 100ms 传输延迟必然到达节点 toc的输入门“tic”,并触发其 handleMessage() 函数。 不难看出该消息就像一只乒乓球,将在两个节点间来回传输。不过请注意,此模拟中没有内置停止条件:它将永远持续。你可以在IDE上让它停止运行。

5 配置omn​​etpp.ini

为了能够运行模拟,我们需要创建omnetpp.ini文件。omnetpp.ini告诉仿真程序要模拟哪个网络(因为ned文件可能包含多个网络),可以将参数传递给模型,显式指定随机数生成器的种子等。

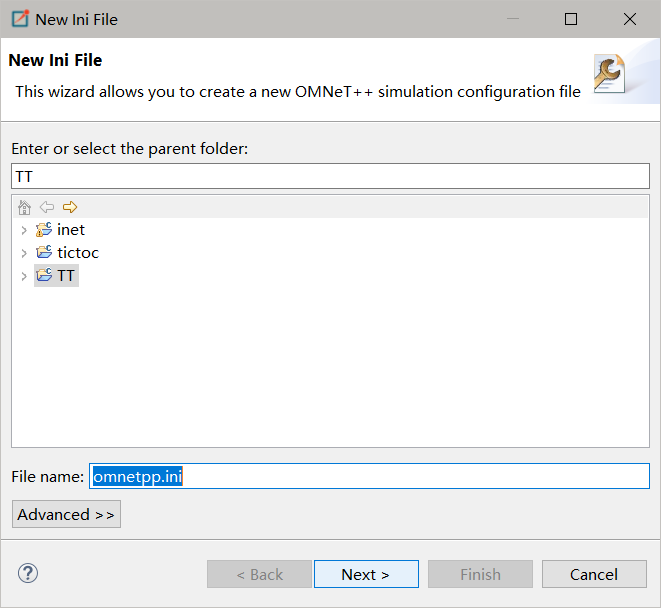
从菜单里选择 File -> New -> Initialization file (INI) 创建omnetpp.ini文件。新文件将在IniFile编辑器中打开。作为ned编辑器,inifile编辑器还有两种模式,FormSource,用于编辑相同的内容。前者更适合配置仿真内核,后者更适合输入模块参数。

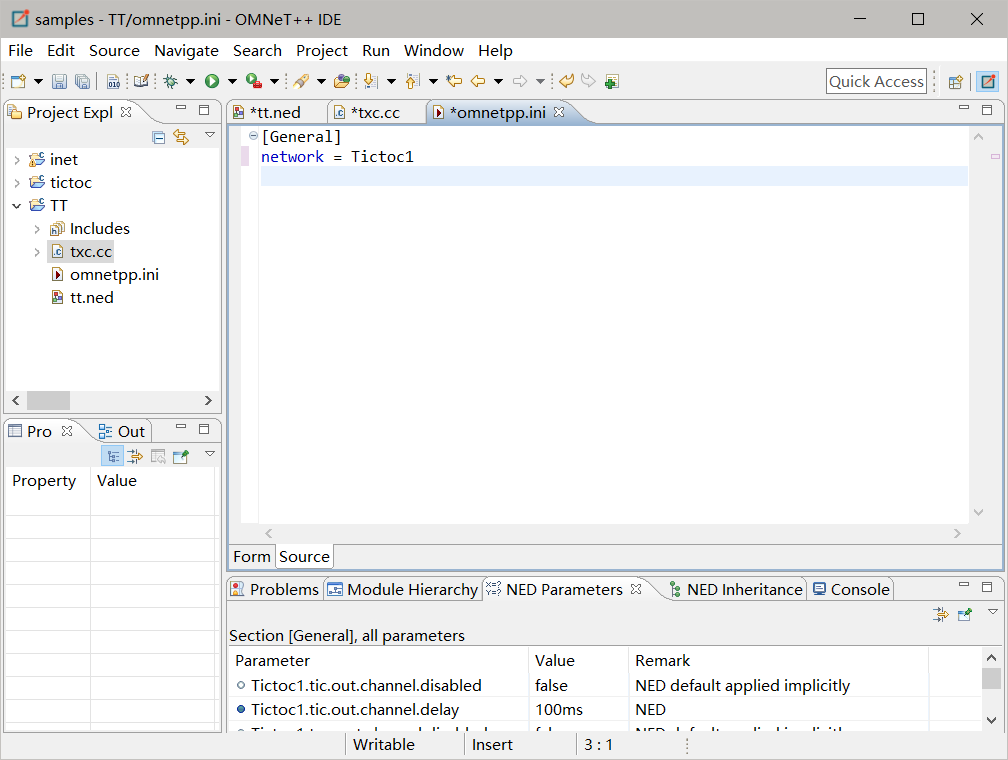
现在,只需切换到 Source 模式并输入以下内容:

1
2
[General]
network = Tictoc1


点击 Run 或使用快捷键 Ctrl+F11 运行,可能弹出两个提示框,不用管他,直接运行即可,最后会弹出一个窗口来显示仿真结果,效果如图。

下一节我会着重讲一下模拟的过程。就说到这里吧,有什么问题大家可以通过评论区联系我。

OMNET++入门教程|第1章 —— TicToc模型

https://gwliang.com/2019/09/26/omnet-ru-men-jiao-cheng-2/

作者

Gaowan Liang

发布于

2019-09-26

更新于

2019-11-17

许可协议

评论